

Simple Cherry Blossom Branch Drawing

Click HERE to save the tutorial to Pinterest!
In Japanese, the word for "cherry blossom" is sakura.
The sakura is an integral part of Japanese culture. It appears in ancient and modern artwork, and thousands of cherry trees grow in tended gardens across the country. Some parks host thousands of trees.
One location features a single tree, a weeping cherry that is several thousand years old.
Each year, during the months of March, April, and May, cherry trees bloom in shades of white, pink, and red.
Many tourists flock to Japan for the annual cherry blossom festivals. Japanese families engage in hanami, parties or picnics held under the trees so that all can enjoy their beauty.
There are even cherry blossom flavored treats, such as candies and a special version of Coca Cola.
Scroll down for a downloadable PDF of this tutorial.
Cherry trees also grow in many other parts of the world, and festivals in Japanese style have emerged around them.
For example, a large cherry blossom festival is held in Washington, D.C., U.S.A., which is home to cherry trees gifted to the country by Japanese ambassadors.
Would you like to draw a cherry blossom? Doing so is easy with the help of this simple, step-by-step cherry blossom drawing guide.
All you will need is a pencil, an eraser, and a sheet of paper. You may also wish to use crayons, colored pencils, markers, or paints to shade your finished drawing.
If you liked this tutorial, see also the following drawing guides: Sunflower, Lotus, and Lily.
Step-by-Step Instructions for Drawing Cherry Blossoms

1. Begin by drawing a single flower. To do so, draw a "U" shaped line with a little indentation at the bottom of the "U," Then, draw additional dented, "U" shaped lines pointed in different directions. Allow the lines to connect at the top of each "U," forming a flower with five petals.

2. Draw a second flower, partially hidden by the first. Again, use dented, "U" shaped lines, allowing them to connect to form the blossom's outline.

3. Draw a third flower above the others. Again, use "U" shaped lines with dented bottoms, connected to enclose the shape of the flower.

4. Draw a fourth flower, again using "U" shaped lines with dented bottoms.

5. Next, you will begin to connect the flowers with a cherry branch. To draw the branch, extend a pair of parallel, roughly "S" shaped lines between two of the flowers. Notice the knotty extrusion at the bends in the branch. Below the bottom set of flowers, extend another set of twisted lines. Connect them at the end using a short, curved line.
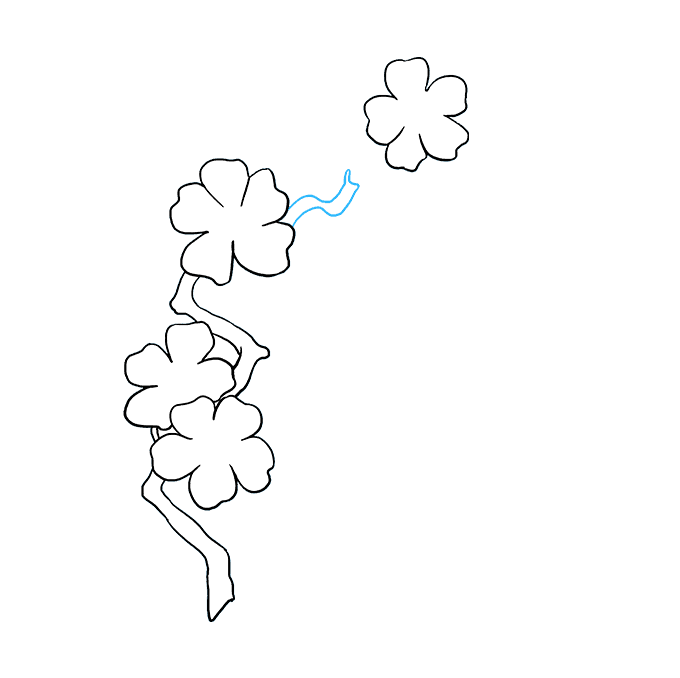
6. Extend a short branch between the uppermost flowers using two curved lines shaped like a backwards letter "S." Connect the lines using a short, curved line.

7. Add delicate details to the branch. Place two sets of curved lines between the bottom-most flower and the branch. Extend three sets of curved lines from the top of the branch to the uppermost flower. Beside the flower, draw a "C" shaped line. Enclose a jagged figure within it using several short, curved lines that meet in "V" shaped points. This forms the base of an unopened flower bud.

8. Using several curved lines, enclose the shape of the flower bud. Notice how the interior lines indicate overlapping petals. Enclose an irregular teardrop shape below the flower, indicating a fallen petal.

9. Draw a tiny circle within each flower. Extend six short, curved lines from each, and end each line with another small circle. This represents the flowers' anthers and stamen.
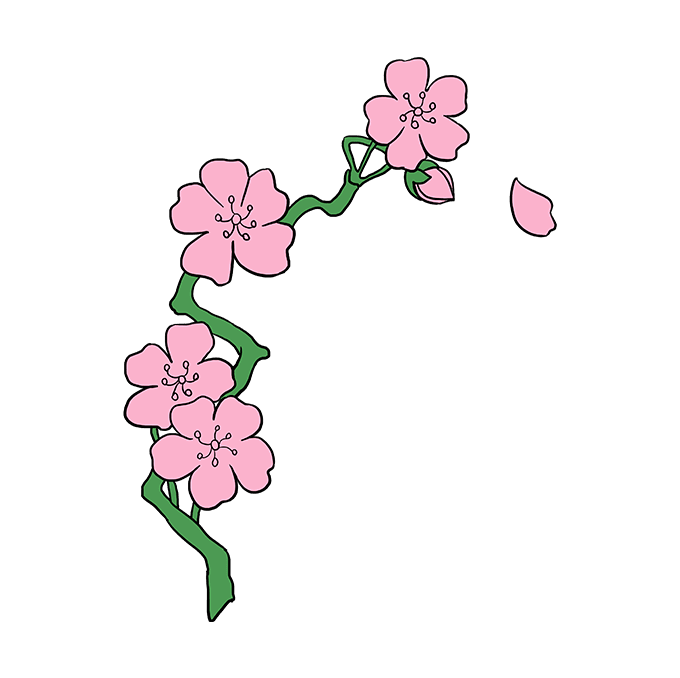
10. Color your sakura cherry blossoms. Most come in shades of pink, white, or red. Don't forget to check out our other multicultural drawing guides, such as the Japanese koi fish and the simple mandala.
Scroll down for a downloadable PDF of this tutorial.
Printable Drawing Tutorial
MEMBER TROUBLESHOOTING
Still seeing ads or not being able to download the PDF?
First, check that you're logged in. You can log in on the member login page.
If you're still not able to download the PDF, the likely solution is to reload the page.
You can do this by clicking the browser reload button.
It is a circular arrow-shaped icon at the top of the browser window, typically found in the upper-left side (you can also use keyboard shortcuts: Ctrl+R on PC and Command+R on Mac).
Simple Cherry Blossom Branch Drawing
Source: https://easydrawingguides.com/draw-cherry-blossoms-really-easy-drawing-tutorial/
Posted by: deansthiletwed.blogspot.com
0 Response to "Simple Cherry Blossom Branch Drawing"
Post a Comment